Lexus ES: Components
Lexus ES (XZ10) Service Manual / Vehicle Exterior / Door / Hatch / Fuel Lid Opener Motor Assembly / Components
COMPONENTS
ILLUSTRATION
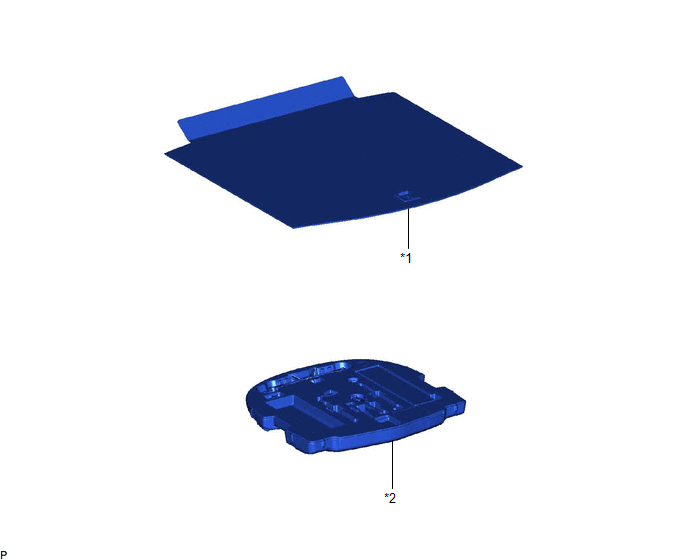
| *1 | LUGGAGE COMPARTMENT FLOOR MAT | *2 | SPARE WHEEL COVER TRAY |
ILLUSTRATION
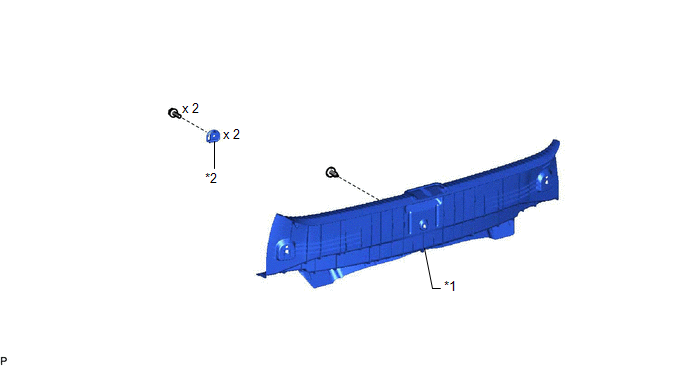
| *1 | REAR FLOOR FINISH PLATE | *2 | LUGGAGE HOLD BELT STRIKER ASSEMBLY |
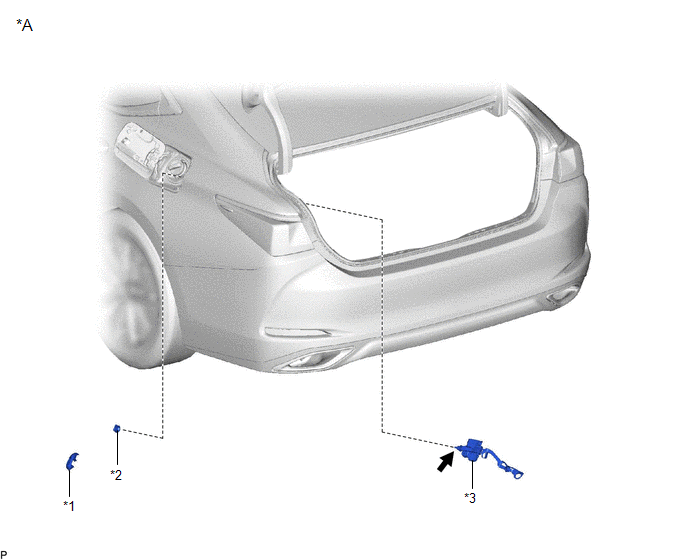
ILLUSTRATION
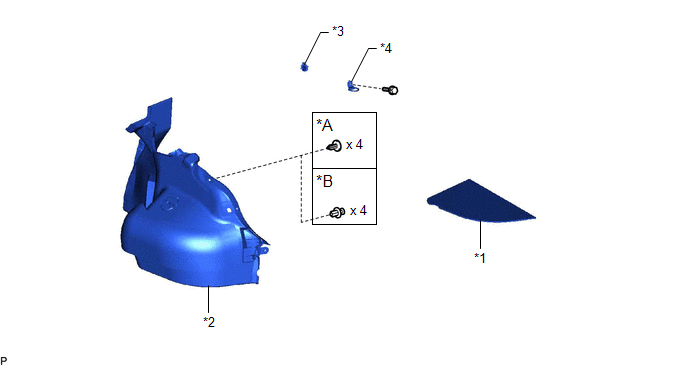
| *A | for Type A | *B | for Type B |
| *1 | LUGGAGE COMPARTMENT TRIM COVER LH | *2 | LUGGAGE COMPARTMENT TRIM INNER COVER LH |
| *3 | ROPE HOOK | *4 | LUGGAGE HOLD BELT STRIKER ASSEMBLY |
ILLUSTRATION
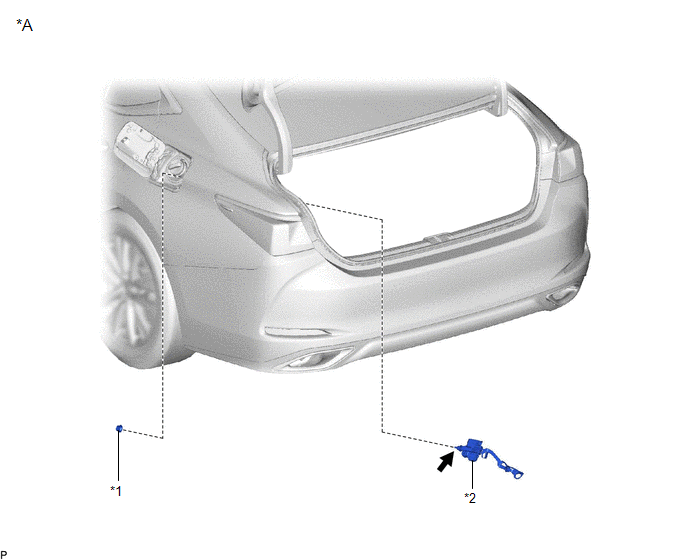
| *A | for Gasoline Model | - | - |
| *1 | FUEL FILLER OPENING LID LOCK RETAINER | *2 | FUEL LID LOCK WITH MOTOR ASSEMBLY |
.png) | MP grease | - | - |
ILLUSTRATION
| *A | for HV Model | - | - |
| *1 | FUEL FILLER OPENING LID LOCK COVER | *2 | FUEL FILLER OPENING LID LOCK RETAINER |
| *3 | FUEL LID LOCK WITH MOTOR ASSEMBLY | - | - |
| | MP grease | - | - |
READ NEXT:
 Removal
REMOVAL PROCEDURE 1. REMOVE LUGGAGE COMPARTMENT FLOOR MAT Click here 2. REMOVE SPARE WHEEL COVER TRAY Click here 3. REMOVE REAR FLOOR FINISH PLATE Click here 4. REMOVE LUGGAGE COMPARTMENT TRIM C
Inspection
INSPECTION PROCEDURE 1. INSPECT FUEL LID LOCK WITH MOTOR ASSEMBLY (a) Check the operation of the fuel lid lock with motor assembly (motor operation). (1) Apply auxiliary battery voltage to the fuel li
Installation
INSTALLATION PROCEDURE 1. INSTALL FUEL LID LOCK WITH MOTOR ASSEMBLY (a) Apply MP grease to the sliding parts of the fuel lid lock with motor assembly. (b) Connect the connector. (c) Engage the 2 claws
SEE MORE:
Communication Error From Clearance Sonar ECU to VSC (C164B)
DESCRIPTION The electronically controlled brake system receives parking support brake system information from the clearance warning ECU assembly via CAN communication. When it is determined that there is a communication error between the skid control ECU and clearance warning ECU assembly, DTC C164B
Brake Pressure Control Solenoid "B" Control Circuit Short to Battery (C13C912,...,C13C949)
DESCRIPTION The ABS solenoid relay and master cylinder cut solenoid valves are built into the brake actuator assembly. Depending on the operating conditions, the master cylinder cut solenoid valves regulates the brake fluid pressure generated by the pump motor. When this DTC is stored, the fail-safe
© 2016-2026 Copyright www.lexguide.net
