Lexus ES: A25a-fks Battery
Components
COMPONENTS
ILLUSTRATION

|
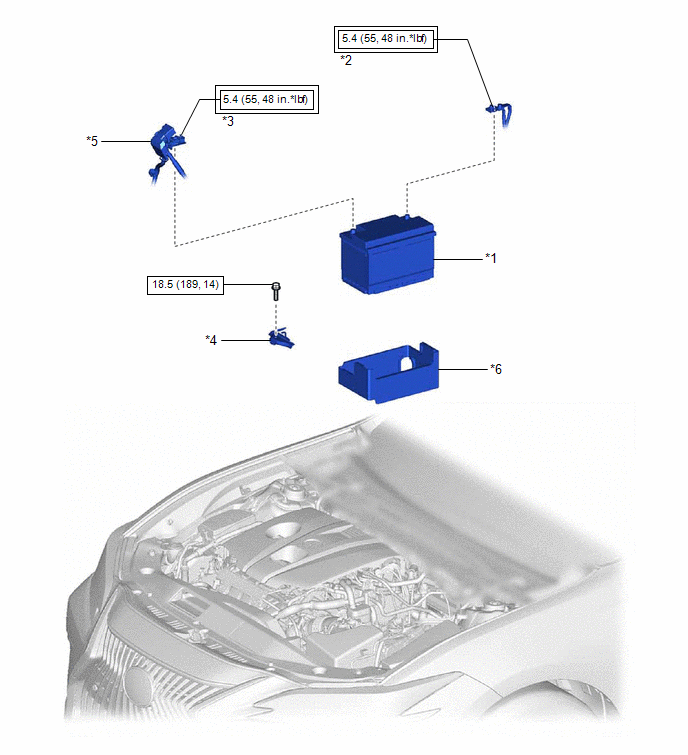
*1 |
BATTERY |
*2 |
NEGATIVE BATTERY TERMINAL |
|
*3 |
POSITIVE BATTERY TERMINAL |
*4 |
NO. 2 BATTERY CLAMP |
|
*5 |
BATTERY TERMINAL CAP |
*6 |
BATTERY INSULATOR |
.png) |
Tightening torque for "Major areas involving basic vehicle performance such as moving/turning/stopping": N*m (kgf*cm, ft.*lbf) |
.png) |
N*m (kgf*cm, ft.*lbf): Specified torque |
Installation
INSTALLATION
PROCEDURE
1. INSTALL BATTERY
(a) Install the battery insulator to the battery.
(b) Install the battery to the vehicle.
(c) Install the No. 2 battery clamp to the battery clamp sub-assembly with the bolt.
Torque:
18.5 N·m {189 kgf·cm, 14 ft·lbf}
.png)
.png) |
Install in this Direction |
(d) Connect the cable to the positive (+) battery terminal and tighten the nut.
Torque:
5.4 N·m {55 kgf·cm, 48 in·lbf}
(e) Engage the 2 claws to install the battery terminal cap to the positive (+) battery terminal.
2. CONNECT CABLE TO NEGATIVE BATTERY TERMINAL
(a) Connect the cable to the negative (-) battery terminal and tighten the nut.
Torque:
5.4 N·m {55 kgf·cm, 48 in·lbf}
NOTICE:
When disconnecting the cable, some systems need to be initialized after the cable is reconnected.
Click here .gif)
.gif)

