Lexus ES: Coolant
Components
COMPONENTS
ILLUSTRATION
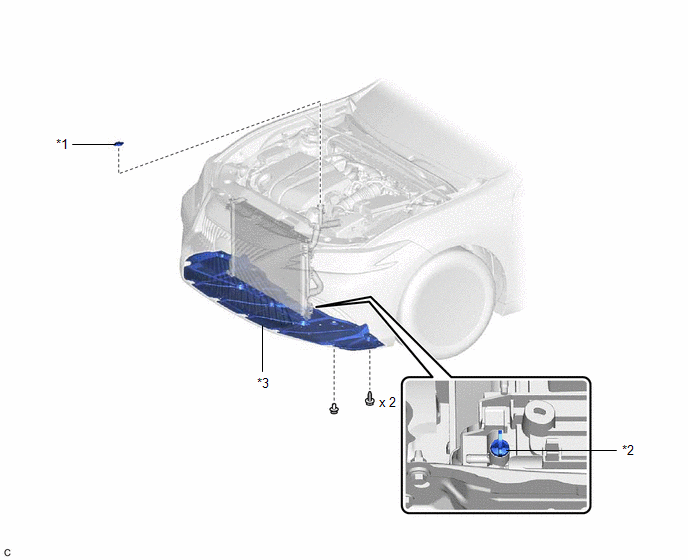
| *1 | RADIATOR CAP SUB-ASSEMBLY | *2 | RADIATOR DRAIN COCK PLUG |
| *3 | NO. 1 ENGINE UNDER COVER | - | - |
Replacement
REPLACEMENT
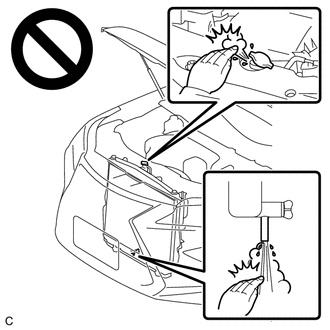
CAUTION / NOTICE / HINT
CAUTION:
Do not remove the radiator cap sub-assembly or radiator drain cock plug while the engine and radiator assembly are still hot. Pressurized, hot engine coolant and steam may be released and cause serious burns.
PROCEDURE
1. DRAIN ENGINE COOLANT
Click here 
2. ADD ENGINE COOLANT
Click here
3. INSPECT FOR COOLANT LEAK
Click here
READ NEXT:
 Precaution
PRECAUTION INITIALIZATION NOTICE: Make sure to perform the necessary procedures (adjustment, calibration, initialization, or registration) after parts related to the cooling fan system have been remov
Parts Location
PARTS LOCATION ILLUSTRATION *1 FAN WITH MOTOR ASSEMBLY - COOLING FAN MOTOR - COOLING FAN ECU *2 ECM *3 NO. 1 ENGINE ROOM RELAY BLOCK AND NO. 1 JUNCTION BLOCK ASSEMBLY - EFI-MAIN NO. 1
SEE MORE:
Inspection
INSPECTION PROCEDURE 1. INSPECT BRAKE CYLINDER AND PISTON (a) Check the rear disc brake cylinder bore and rear disc brake piston for rust and scoring. If necessary, replace the rear disc brake cylinder and rear disc brake piston. 2. INSPECT PAD LINING THICKNESS (a) Using a ruler, measure the rear
Components
COMPONENTS ILLUSTRATION *1 SLIDING ROOF OR REMOVABLE ROOF PANEL SUB-ASSEMBLY *2 SLIDING ROOF SIDE GARNISH LH *3 SLIDING ROOF SIDE GARNISH RH *4 SLIDING ROOF WEATHERSTRIP *5 SLIDING ROOF PANEL SUB-ASSEMBLY - - N*m (kgf*cm, ft.*lbf): Specified torque ● Non-re
© 2016-2026 Copyright www.lexguide.net
