Lexus ES: Components
COMPONENTS
ILLUSTRATION
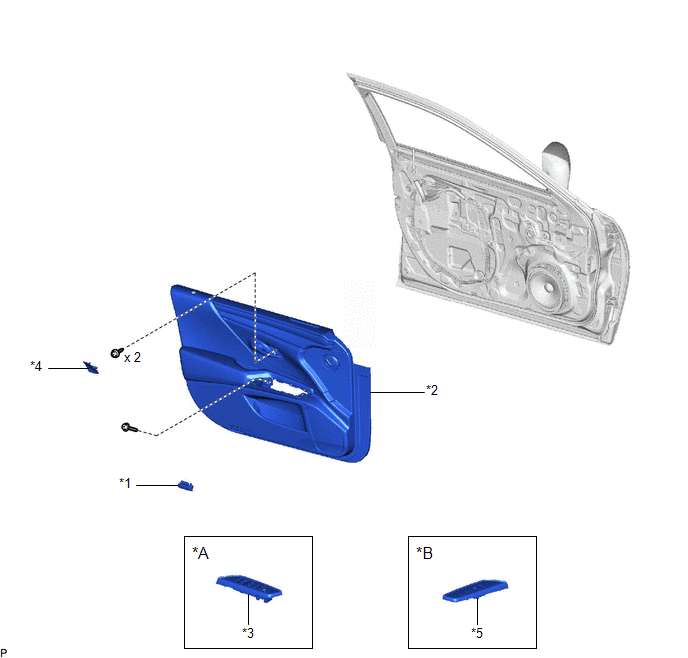
| *A | for Driver Side | *B | for Front Passenger Side |
| *1 | COURTESY LIGHT ASSEMBLY | *2 | FRONT DOOR TRIM BOARD SUB-ASSEMBLY |
| *3 | MULTIPLEX NETWORK MASTER SWITCH ASSEMBLY WITH FRONT DOOR UPPER ARMREST BASE PANEL | *4 | NO. 2 DOOR TRIM PAD |
| *5 | POWER WINDOW REGULATOR SWITCH ASSEMBLY WITH FRONT DOOR UPPER ARMREST BASE PANEL | - | - |
ILLUSTRATION
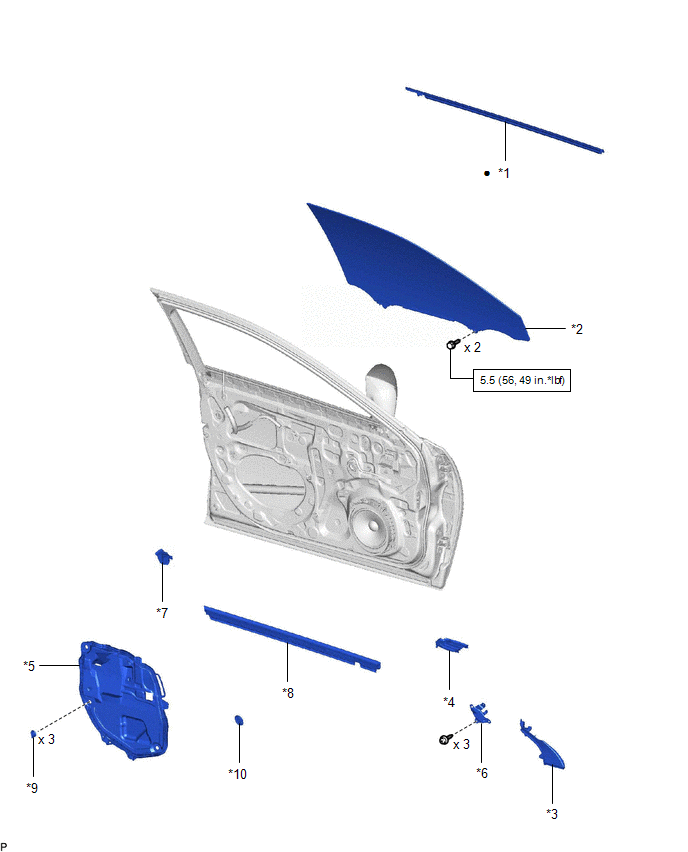
| *1 | FRONT DOOR BELT MOULDING ASSEMBLY | *2 | FRONT DOOR GLASS SUB-ASSEMBLY |
| *3 | FRONT DOOR LOWER FRAME BRACKET GARNISH | *4 | FRONT DOOR PANEL PROTECTOR |
| *5 | FRONT DOOR SERVICE HOLE COVER | *6 | FRONT DOOR TRIM BRACKET |
| *7 | FRONT DOOR VENT SEAL | *8 | FRONT DOOR INNER GLASS WEATHERSTRIP |
| *9 | FRONT DOOR WEATHERSTRIP CLIP | *10 | HOLE PLUG |
.png) | N*m (kgf*cm, ft.*lbf): Specified torque | ● | Non-reusable part |
READ NEXT:
 Removal
REMOVAL CAUTION / NOTICE / HINT The necessary procedures (adjustment, calibration, initialization, or registration) that must be performed after parts are removed and installed, or replaced during fro
Installation
INSTALLATION CAUTION / NOTICE / HINT HINT:
Use the same procedure for the RH side and LH side.
The following procedure is for the LH side.
PROCEDURE 1. PRECAUTION NOTICE: After turning the eng
SEE MORE:
Key-off Operation Function Operates even if Operating Conditions are not Satisfied
DESCRIPTION When the front doors are closed, each power window regulator motor assembly can be operated for approximately 45 seconds after the engine switch is turned from on (IG) to off by receiving operation permission signals from the main body ECU (multiplex network body ECU). However, when appr
Open in One Side of Bus 3 Branch Line
DESCRIPTION When the CAN bus main lines are normal (no open, short to ground, short to +B or short between lines) and there is an ECU or sensor on the "Communication Bus Check" screen that is indicated as not communicating or whose connection status on the "Communication Bus Check" screen changes in
© 2016-2026 Copyright www.lexguide.net
