Lexus ES: Components
COMPONENTS
ILLUSTRATION
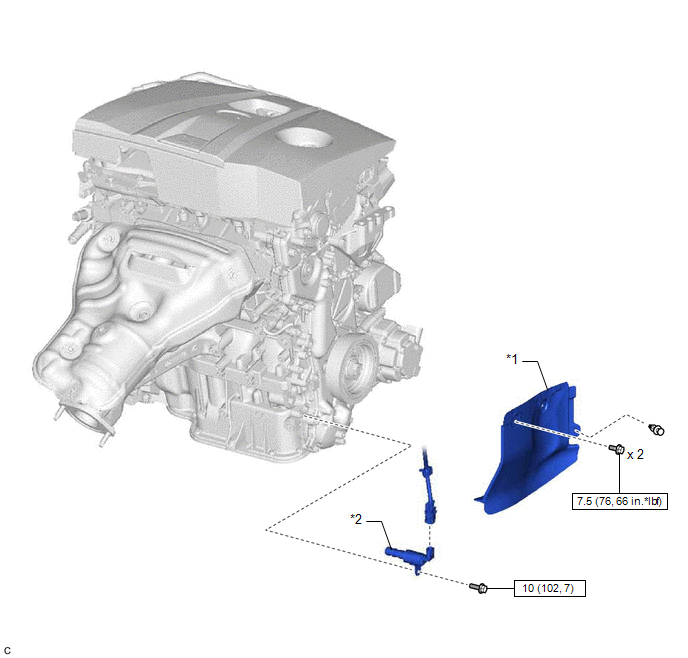
| *1 | FRONT FENDER APRON SEAL RH | *2 | OIL PRESSURE CONTROL VALVE ASSEMBLY |
.png) | N*m (kgf*cm, ft.*lbf): Specified torque | - | - |
READ NEXT:
 Removal
REMOVAL CAUTION / NOTICE / HINT NOTICE: This procedure includes the removal of small-head bolts. Refer to Small-Head Bolts of Basic Repair Hint to identify the small-head bolts. Click here PROCEDURE
Inspection
INSPECTION PROCEDURE 1. INSPECT OIL PRESSURE CONTROL VALVE ASSEMBLY (a) Measure the resistance according to the value(s) in the table below. Standard Resistance: Tester Connection Condition
Installation
INSTALLATION CAUTION / NOTICE / HINT NOTICE: This procedure includes the installation of small-head bolts. Refer to Small-Head Bolts of Basic Repair Hint to identify the small-head bolts. Click here
SEE MORE:
Precaution
PRECAUTION PRECAUTION FOR DISCONNECTING CABLE FROM NEGATIVE AUXILIARY BATTERY TERMINAL NOTICE: When disconnecting the cable from the negative (-) auxiliary battery terminal, initialize the following system(s) after the cable is reconnected. System See Procedure Lane Control System (for HV M
DC/DC Converter Temperature Sensor 2 Circuit Short to Ground (P0E5811,P0E5815)
DESCRIPTION The motor generator control ECU (MG ECU), which is built into in the inverter with converter assembly, detects the temperature of the boost converter using the boost converter temperature sensor 2 (lower). The motor generator control ECU (MG ECU) also detects malfunctions in the boost co
© 2016-2026 Copyright www.lexguide.net
